

Here is the official photo on OKL, followed by step-by-step instructions. Happy DIYing on this Memorial Day Weekend!
This is an easy peesy DIY, and OKL made it even easier by providing a list of all the needed pieces. See below.
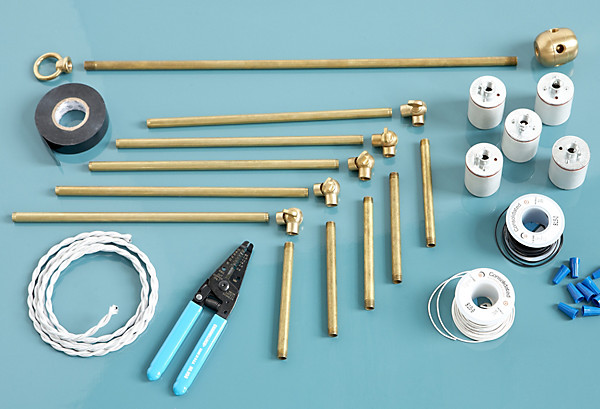
What You’ll Need:
- 1 brass loop 1/8F IPS
- 5 5-inch brass pipes 1/8F IPS
- 5 10-inch brass pipes 1/8F IPS
- 1 18-inch brass pipe 1/8F IPS
- 5 Edison Porcelain Keyless sockets 660W-250V 1/8-27 CAP
- 5 1/8F x 1/8F IPS adjustable brass swivel (or 5 1/8F bottom X 1/8F side 90 deg. straight armback elbows)
- 1 5-hole 1/8 sides x 1/8 bottom x 1/8 top large cluster body
- 5 feet of 2 wire twisted cord (more depending on sealing height)
- 5 Satco Glob Lights 40 W G40 clear (not pictured)
TIP: Although it is not listed on their site, you can email SL Lighting NYC(info@sllightingnyc.com) with the above parts list, and they will ship it all to you.
From MC Master-Carr:
- 15 feet of single strand conductor wire in white (UL 1007/1569, 18 AWG, 300 VAC, White)
- 15 feet of single strand conductor wire in black (UL 1007/1569, 18 AWG, 300 VAC)
- A pair of wire strippers
- 1 roll of electrical tape
- A screwdriver
From Grand Brass:
- One package of twist-on wire connectors (WINUTB)
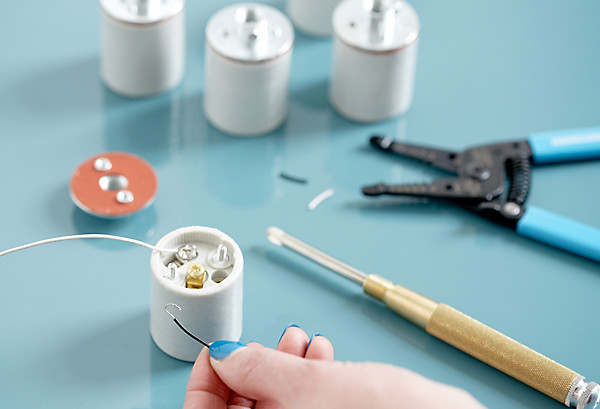
Wire the Sockets:
1. Unscrew the back of the socket from the ceramic body using the screws located in inside the socket opening.
2. Cut a 2-foot length of both black and white wire. Use your wire stripper to remove about 1/4 inch of the plastic sheath from the ends of each wire.
3. Twist the exposed wire ends to keep them from fraying, and bend them to form a hook.
4. Be sure to always attach the black wire to the gold screw and the white wire to the silver screw. Hook each wire in place around the base of each screw and tighten. Reattach the socket backing, threading the wires through the hole in the top.
5. Repeat this process for all five sockets.
Tip: Always hook the wire around the screws so that it wraps clockwise. This will help keep it in place as you screw.
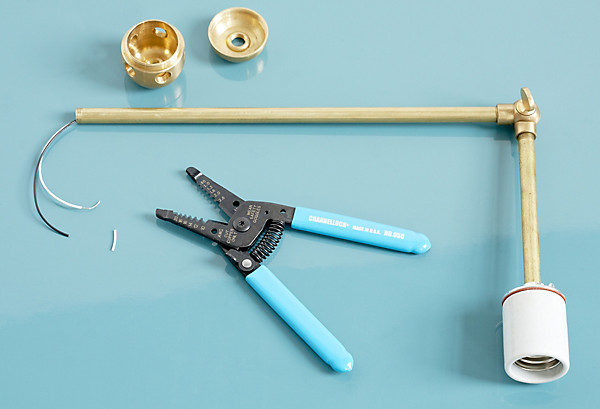
Above the wired arm is the cluster body. It unscrews to allow for easy connections.
Construct the Arms:
1. Construct the brass arm by screwing it together, as shown using the 10-inch pipe, the 5-inch pipe, and the brass swivel. Then, screw the socket in place threading the wires all the way through to the end of the 10-inch pipe.
2. Repeat this process for all five arms.
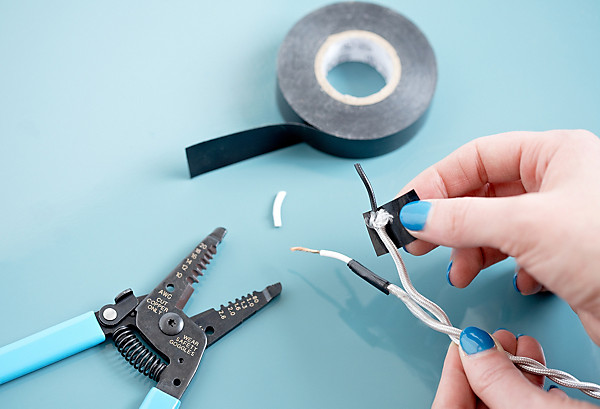
Prep the Cloth Wire:
1. Push back the cloth covering from the end of the wire and secure it with electrical tape.
2. Strip both wires about 1/2 inch from the ends.
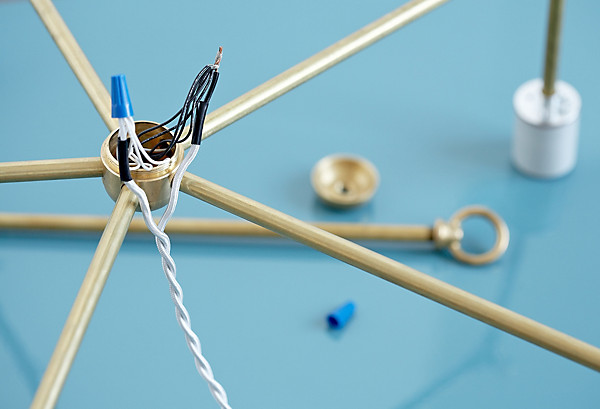
Join the Wires:
1. Twist together the small white wires in the cluster body with the larger white cloth wire. Secure with a twist on wire connector. Repeat process with the black wires.
2. Gently push the wires inside the cluster body and reattach the cap. Thread the cloth wire through the hole in the top.
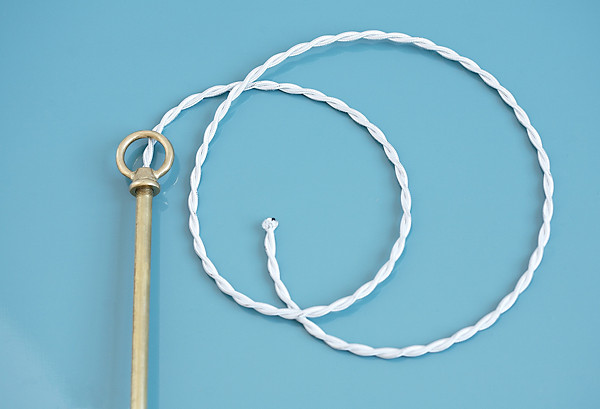
3. Thread the cloth wire through the remaining 17-inch brass pipe and screw it to the top of the cluster body.
Finish Up:
1. Screw the brass loop to the top of your 17-inch pipe.
Tip: You should use an electrician to install your new chandelier. You should let her or him know that you will need a brass dome canopy kit to complete the install.

This is fabulous and very much like the Lindsay Aldeman light I have in my office - love the DIY aspect of it and it looks amazing paired with an ornate ceiling rose!! Love that juxtaposition of the raw against the refined... sigh xx
ReplyDeleteI am a sucker for that sort of juxtaposition. Glad you like it! Gotta thank OKL for sharing this awesome DIY tutorial. And it came at the perfect time for me when I was on the hunt for a similar light fixture but all the ones I liked were $2k+ (yikes, right?!).
DeleteThat looks amazing and I love the midcentury lighting with your incredible molding…gorgeous!
ReplyDeleteThank you so much! I love the juxtaposition of ornate and clean, modern and old. Thanks for stopping by and commenting. Means a lot to me!
DeleteHi Diana! Yes, you certainly should be able to if you take the list of materials to your local hardware store. You might need to go to a couple hardware stores to find all the items you're looking for. Or you can order it online from the sources linked above. I got my materials from Grand Brass. Hope that helps!
ReplyDelete